Install the package using the appropriate tool, as
demonstrated in Example 11.1, “Installing repro on Debian/Ubuntu” and
Example 11.2, “Install repro on Fedora/RHEL/CentOS”. If the package is not
available for your platform, you may be able to build it using the
instruction in Appendix B, Building reSIProcate RPMs on RHEL and CentOS.
Example 11.1. Installing repro on Debian/Ubuntu
$ sudo apt-get install repro
$ sudo addgroup repro ssl-cert
Example 11.2. Install repro on Fedora/RHEL/CentOS
$ sudo yum install resiprocate-repro
$ sudo addgroup repro ssl-cert
The configuration file is /etc/repro/repro.config.
Make essential changes to the configuration file, all other values
can remain with default settings. Example 11.3, “Sample values for repro.config”
demonstrates the main things you need to add or change from default
values.
An important thing to note about the example is that we
explicitly configure each transport. The Transport1...
settings declare a TLS transport binding on a specific IP address
and port. When one or more transports are defined in this way,
the settings for global transport configuration, such as
IPAddress and UDPPort, are completely ignored.
For SIP to work reliably, binding to specific IP addresses is highly
recommended. This ensures that outgoing TCP or TLS connections
always use the correct source address and that the intended addresses
are always included in Via headers.
The exact location of the *.pem files can be
changed if necessary.
Example 11.3. Sample values for repro.config
# To trust email certificates as SIP client certificates:
TLSUseEmailAsSIP = true

# Transport1 will be for SIP over TLS connections
# We use port 5061 here but if you have clients connecting from
# locations with firewalls you could change this to listen on port 443
Transport1Interface = 198.51.100.19:5061
Transport1Type = TLS
Transport1TlsDomain = example.org
Transport1TlsClientVerification = Optional
Transport1RecordRouteUri = sip:example.org;transport=TLS
# Configuration for manually maintained TLS certificates:
Transport1TlsPrivateKey = /etc/ssl/private/example.org-key.pem
Transport1TlsCertificate = /etc/ssl/public/example.org.pem
# Configuration for certificates obtained using Let's Encrypt / certbot:
#Transport1TlsPrivateKey = /etc/letsencrypt/live/example.org/privkey.pem
#Transport1TlsCertificate = /etc/letsencrypt/live/example.org/fullchain.pem

# Transport2 is the IPv6 version of Transport1
Transport2Interface = 2001:DB8:1000:2000::19:5061
Transport2Type = TLS
Transport2TlsDomain = example.org
Transport2TlsClientVerification = Optional
Transport2RecordRouteUri = sip:example.org;transport=TLS
# Configuration for manually maintained TLS certificates:
Transport2TlsPrivateKey = /etc/ssl/private/example.org-key.pem
Transport2TlsCertificate = /etc/ssl/public/example.org.pem
# Configuration for certificates obtained using Let's Encrypt / certbot:
#Transport2TlsPrivateKey = /etc/letsencrypt/live/example.org/privkey.pem
#Transport2TlsCertificate = /etc/letsencrypt/live/example.org/fullchain.pem

# Transport3 will be for SIP over WebSocket (WebRTC) connections
# We use port 8443 here but you could use 443 instead
Transport3Interface = 198.51.100.19:8443
Transport3Type = WSS
Transport3TlsDomain = example.org
# This would require the browser to send a certificate, but browsers
# don't currently appear to be able to, so leave it as None:
Transport3TlsClientVerification = None
Transport3RecordRouteUri = sip:example.org;transport=WSS
# Configuration for manually maintained TLS certificates:
Transport3TlsPrivateKey = /etc/ssl/private/example.org-key.pem
Transport3TlsCertificate = /etc/ssl/public/example.org.pem
# Configuration for certificates obtained using Let's Encrypt / certbot:
#Transport3TlsPrivateKey = /etc/letsencrypt/live/example.org/privkey.pem
#Transport3TlsCertificate = /etc/letsencrypt/live/example.org/fullchain.pem

# Transport4 is the IPv6 version of Transport3
Transport4Interface = 2001:DB8:1000:2000::19:8443
Transport4Type = WSS
Transport4TlsDomain = example.org
Transport4TlsClientVerification = None
Transport4RecordRouteUri = sip:example.org;transport=WSS
# Configuration for manually maintained TLS certificates:
Transport4TlsPrivateKey = /etc/ssl/private/example.org-key.pem
Transport4TlsCertificate = /etc/ssl/public/example.org.pem
# Configuration for certificates obtained using Let's Encrypt / certbot:
#Transport4TlsPrivateKey = /etc/letsencrypt/live/example.org/privkey.pem
#Transport4TlsCertificate = /etc/letsencrypt/live/example.org/fullchain.pem

# Transport5: this could be for TCP connections to an Asterisk server
# in your internal network.  Don't allow port 5060 through the external
# firewall.
Transport5Interface = 198.51.100.19:5060
Transport5Type = TCP
Transport5RecordRouteUri = sip:198.51.100.19:5060;transport=TCP

# Transport6 is the IPv6 version of Transport6
Transport5Interface = 2001:DB8:1000:2000::19:5060
Transport5Type = TCP
Transport5RecordRouteUri = sip:2001:DB8:1000:2000::19:5060;transport=TCP

HttpBindAddress = 198.51.100.19, 2001:DB8:1000:2000::19
HttpAdminUserFile = /etc/repro/users.txt

RecordRouteUri = sip:example.org;transport=tls
ForceRecordRouting = true
EnumSuffixes = e164.arpa, sip5060.net, e164.org
DisableOutbound = false
EnableFlowTokens = true
EnableCertificateAuthenticator = True
Table 11.2, “TLS client verification modes” explains
the options that can be used for the ClientVerification
parameters on each transport.
Table 11.2. TLS client verification modes
(Transport<num>)TLSClientVerification | Impact |
|---|---|
None | The peer is not asked to send a certificate. |
Optional | The peer is asked to send a certificate. If the peer sends a valid certificate or if no certificate is sent at all, the connection will be established. |
Mandatory | Every connection, from client/user devices or external callers must have a client certificate. This is more secure, but some devices don't support client certificates. |
If you are not sure, start with the setting
Optional
As of v1.10.0, repro provides a simpler syntax for configuring database access. Create the databases and tables as described in the section called “SQL databases”. To configure repro to use your tables, see the examples Example 11.4, “Using PostgreSQL” and Example 11.5, “Using MySQL”.
Example 11.4. Using PostgreSQL
DefaultDatabase = 101

Database101Type = postgresql
Database101ConnInfo = host=pg1 port=5432 dbname=repro user=repro password=abc
Example 11.5. Using MySQL
DefaultDatabase = 101

Database101Type = mysql
Database101Host = mysql1
Database101Port = 3306
Database101DatabaseName = repro
Database101User = repro
Database101Password = abc
If you need help with the configuration settings, please join the mailing list repro-users and the reSIProcate team will try to help.
Use the htdigest utility from the Apache web
server to set the password for the web interface admin user,
as demonstrated in Example 11.6, “Using htdigest to set admin user
password”
Example 11.6. Using htdigest to set admin user
password
$ sudo htdigest -c /etc/repro/users.txt repro admin
Adding password for admin in realm repro.
New password:
Re-type new password:
$
Now restart the repro daemon to use the new
settings, as demonstrated in Example 11.7, “Restarting the repro daemon (systemd)”.
You can test that the repro daemon is listening
on the correct ports and that the certificates are valid by using
the OpenSSL s_client utility.
This is demonstrated in Example 11.8, “Using s_client to test SIP ports
(Debian/Ubuntu)”
and Example 11.9, “Using s_client to test SIP ports (Fedora/RHEL/CentOS)”.
Example 11.8. Using s_client to test SIP ports
(Debian/Ubuntu)
$ openssl s_client -connect sip-proxy.example.org:5061 \
        -CApath /etc/ssl/certs
...
     Verify return code: 0 (ok)
---
Example 11.9. Using s_client to test SIP ports (Fedora/RHEL/CentOS)
$ openssl s_client -connect sip-proxy.example.org:5061 \
        -CAfile /etc/ssl/certs/ca-bundle.crt
...
     Verify return code: 0 (ok)
---
The output should finish with
Verify return code: 0 (ok). If you don't see that
then the server is not running, the firewall is blocking the
connection, the port is wrong or there is some problem with the
certificate file or the repro.config configuration file.
You may also find clues in Syslog or the repro.log file.
Go to http://server1.example.org:5080 and log in
as the admin user you created.
Click to add a domain. The screenshot in Figure 11.1, “repro web administration: adding a domain” demonstrates how to add the domain example.org.
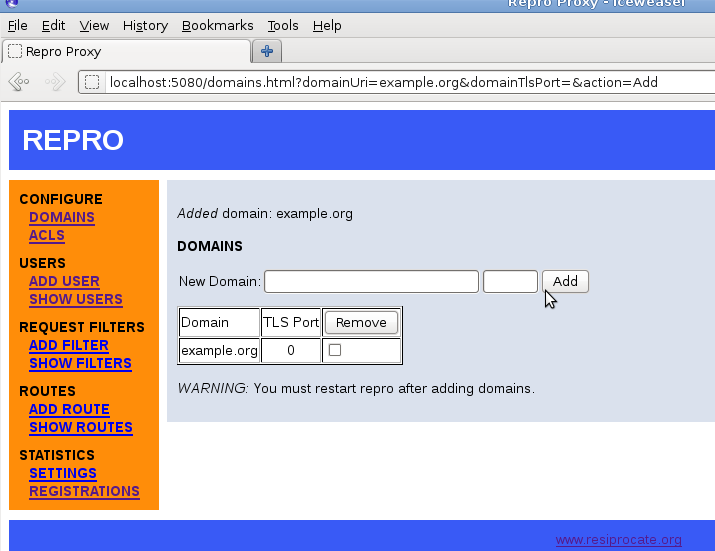
Now you must restart the
repro daemon again to use the new domain, as
demonstrated in Example 11.7, “Restarting the repro daemon (systemd)”.
It is not necessary to add users manually through the web
interface. If users are identified by TLS client certificates or
WebSocket cookie authentication, the SIP proxy does not need to have
its own list of users at all. If users are stored in an SQL database,
it is possible for other processes to INSERT new users
into the table and repro will see them
immediately.
The screenshot in Figure 11.2, “repro web administration: adding a user” demonstrates adding a user called alice to the domain example.org:

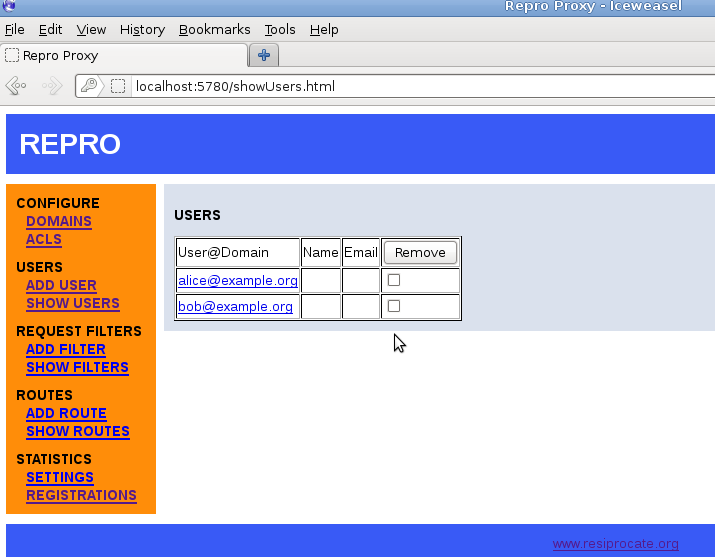
The list of all users can be easily viewed, as demonstrated in Figure 11.3, “repro web administration: listing users”.
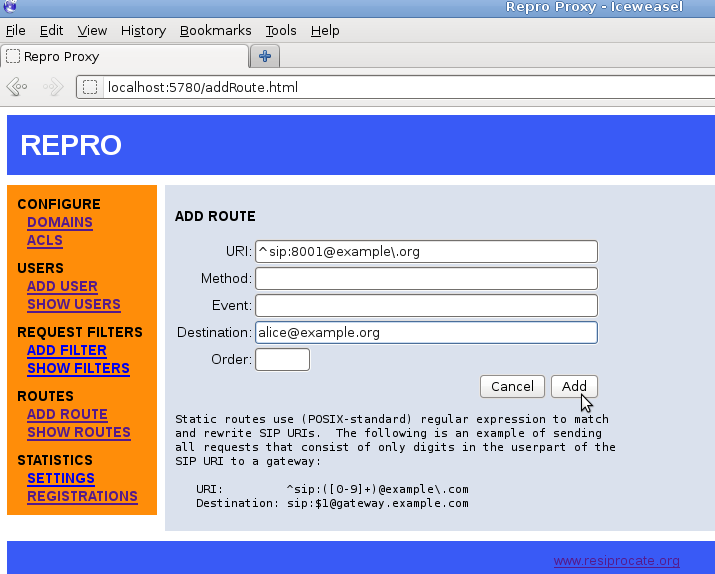
Sometimes, when using a SIP phone, it is easier to dial a number than a full SIP address. In the example.org demonstration, the users have the phone numbers 8001 and 8002. Figure 11.4, “repro web administration: adding a route” demonstrates how to set up the number 8001 for Alice.
Once the numbers have been added, it is easy to view them all using the `Show Routes' page:
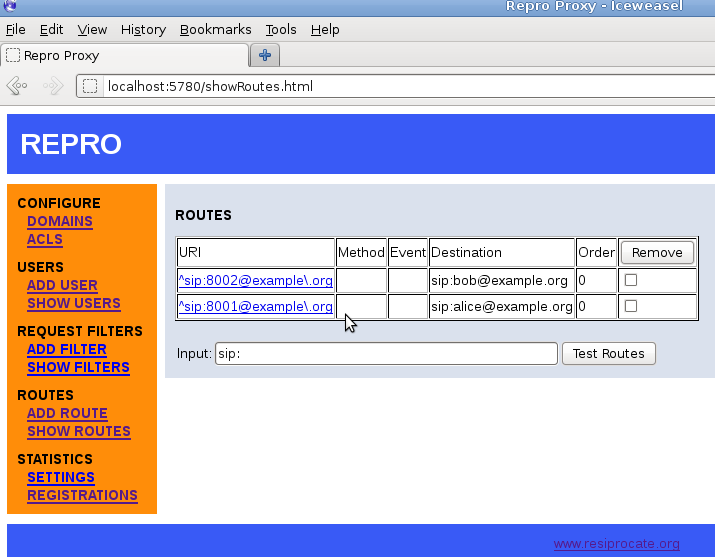
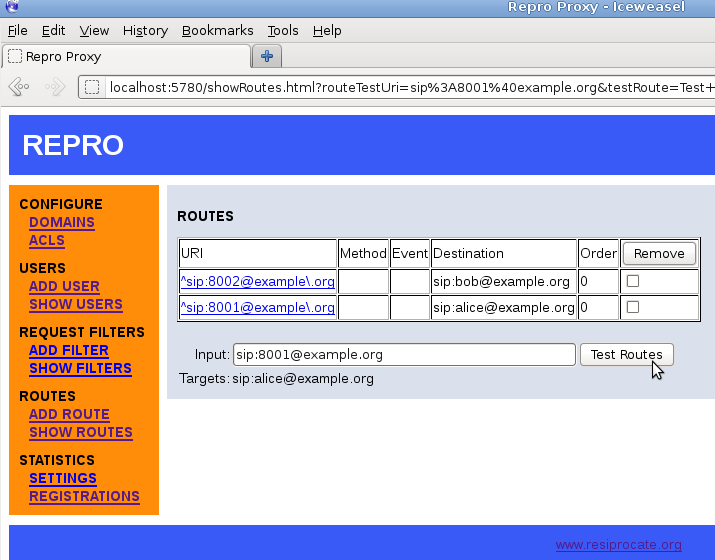
It is also possible to test the regular expressions to see how they are evaluated. This can be very useful when using replacement strings (where a single rule automatically maps to many different results), an example is given in Figure 11.6, “repro web administration: routing test”.
If you need help with the configuration settings, please join the mailing list repro-users and the reSIProcate team will try to help.